20分钟。 5个档案. A级 create-next-app 工程从 WordPress 安装到 WPGraphQL 上, 编辑器仍然拥有每个段落, next build 船舶静态页 revalidate 设置到任何你想要的数字。 下方的行走点是 woographqldemo.wpengine.com ——在您自己的域名中进行交换,并在结尾处适用相同的六步.
盒子里的东西
@axistaylor/nextpress 是一个 npm 包和大约6,000行 TypeScript。 里面装有三块你用电线接通的下一条Js 16号应用程序:
withWCR——aNextConfig设置 WP 倒置代理域和前置的包/wp-content, (中文(简体) )./wp-admin,以及/graphql在下一个运行时间。<Content>——一个反应组件,取出HTML WordPress的原始回放并使其成为真正的回放节点,外加每块每个需要的CSS.nextImageParser– 一个交换每个<img>在WP内容中next/image与width, (中文(简体) ).height,以及sizes从块属性取出.
后端要求: WordPress with WPGraphQL 数据 活动。 任何主机作品——WP Engine,Pantheon,Bluehost,自管VPS——只要 /graphql 回应。
步骤一——下个应用程序的启动
库存 create-next-app 使用 TypeScript 模板,然后添加 @axistaylor/nextpress 从 npm :
npx create-next-app@latest nextpress-quickstart
cd nextpress-quickstart
npm install @axistaylor/nextpress
步骤2 – next.config.ts
withWCR 取出三个参数:基础”下个配置”,”WordPress”起源,和公交前端起源. 包装器重写编辑器所撰写的每个绝对 WordPress URL 到前端相对路径, 这样内部的链接会让文章内容返回您的下一条路径 。
import type { NextConfig } from "next";
import { withWCR } from "@axistaylor/nextpress/withWCR";

const wpDomain = "woographqldemo.wpengine.com";
const wpProtocol = "https";

const nextConfig: NextConfig = {
  images: {
    formats: ["image/avif", "image/webp"],
    remotePatterns: [{ protocol: "https", hostname: wpDomain }],
  },
  env: {
    GRAPHQL_ENDPOINT: `${wpProtocol}://${wpDomain}/graphql`,
  },
};

export default withWCR(
  nextConfig,
  {
    wpDomain,
    wpProtocol,
    wpHomeUrl: `${wpProtocol}://${wpDomain}`,
    wpSiteUrl: `${wpProtocol}://${wpDomain}`,
  },
  {
    frontendDomain: "localhost:3000",
    frontendProtocol: "http",
  },
);
步骤3—— src/proxy.ts
下16个更名 middleware.ts 改为 proxy.ts;角色和配对者的行为没有改变. 处理者做两件事: /wp-* 路径 proxyByWCR 因此浏览器从不触及 WordPress 源头,并设置 x-uri 每个非代理请求的页眉, 因此下游的服务器组件知道要向后端请求排列脚本和样式表 :
import { NextResponse, NextRequest } from "next/server";
import { proxyByWCR, isProxiedRoute } from "@axistaylor/nextpress/proxyByWCR";

export const proxy = async (request: NextRequest) => {
  const pathname = request.nextUrl.pathname;

  if (isProxiedRoute(pathname)) {
    return proxyByWCR(request);
  }

  const headers = new Headers(request.headers);
  headers.set("x-uri", pathname);
  return NextResponse.next({ request: { headers } });
};

export const config = {
  matcher: [
    "/atx/:instance/proxiee",
    "/atx/:instance/wp",
    "/atx/:instance/wc",
    "/atx/:instance/wp-internal-assets/:path*",
    "/atx/:instance/wp-assets/:path*",
    "/atx/:instance/wp-json/:path*",
    "/((?!_next|api|favicon.ico|sw.js|.*\\.).*)",
  ],
};
步骤4—— src/lib/wp.ts
三个同步函数, 一个共享 fetch 包装 fetchPosts 输入索引页, fetchPostBySlug 输入后页, fetchPostSlugs 驱动器 generateStaticParams编辑 next: { revalidate: 60 } 提示在 fetch 是您需要的唯一缓存控制 —— 下一步处理其余的 :
const ENDPOINT = process.env.GRAPHQL_ENDPOINT!;

async function gql<T>(query: string, variables: Record<string, unknown> = {}): Promise<T> {
  const res = await fetch(ENDPOINT, {
    method: "POST",
    headers: { "Content-Type": "application/json" },
    body: JSON.stringify({ query, variables }),
    next: { revalidate: 60 },
  });
  if (!res.ok) throw new Error(`WPGraphQL ${res.status}`);
  const { data, errors } = await res.json();
  if (errors?.length) throw new Error(errors[0].message);
  return data as T;
}

export interface PostSummary {
  slug: string;
  title: string;
  date: string;
  excerpt: string | null;
  featuredImage: { sourceUrl: string; altText: string } | null;
}

export interface Post extends PostSummary {
  content: string;
  contentCssClasses: string;
}

export async function fetchPosts(first = 20): Promise<PostSummary[]> {
  const data = await gql<{ posts: { nodes: PostSummary[] } }>(`
    query Posts($first: Int!) {
      posts(first: $first, where: { status: PUBLISH, orderby: { field: DATE, order: DESC } }) {
        nodes {
          slug title date excerpt
          featuredImage { node { sourceUrl altText } }
        }
      }
    }`, { first });
  return data.posts.nodes;
}

export async function fetchPostSlugs(): Promise<string[]> {
  const data = await gql<{ posts: { nodes: { slug: string }[] } }>(`
    { posts(first: 100, where: { status: PUBLISH }) { nodes { slug } } }`);
  return data.posts.nodes.map(n => n.slug);
}

export async function fetchPostBySlug(slug: string): Promise<Post | null> {
  const data = await gql<{ post: Post | null }>(`
    query Post($slug: ID!) {
      post(id: $slug, idType: SLUG) {
        slug title date excerpt
        content(format: RENDERED)
        contentCssClasses
        featuredImage { node { sourceUrl altText } }
      }
    }`, { slug });
  return data.post;
}
步骤5 – /blog 指数
一个服务器组件, 一个 await没有客户钩。 文章阵列只是JSX:
import Link from "next/link";
import { fetchPosts } from "@/lib/wp";

export const metadata = { title: "Blog" };

export default async function BlogIndex() {
  const posts = await fetchPosts(20);
  return (
    <ul>
      {posts.map((post) => (
        <li key={post.slug}>
          <Link href={`/blog/${post.slug}`}>{post.title}</Link>
          <time>{new Date(post.date).toLocaleDateString()}</time>
        </li>
      ))}
    </ul>
  );
}
步骤6 – /blog/[slug]
generateStaticParams 将每个公布的流星变成构建时的路径. 渲染有两行:一行取向和一行取向. <Content>。 。 。 。
import { notFound } from "next/navigation";
import { Content, nextImageParser } from "@axistaylor/nextpress";
import { fetchPostBySlug, fetchPostSlugs } from "@/lib/wp";

export async function generateStaticParams() {
  const slugs = await fetchPostSlugs();
  return slugs.map((slug) => ({ slug }));
}

export default async function PostPage({ params }: {
  params: Promise<{ slug: string }>;
}) {
  const { slug } = await params;
  const post = await fetchPostBySlug(slug);
  if (!post) notFound();

  return (
    <article>
      <h1>{post.title}</h1>
      <Content
        content={post.content}
        contentCssClasses={post.contentCssClasses}
        parsers={[nextImageParser()]}
      />
    </article>
  );
}
五个文件,两个域,一个npx. 编辑器从不移动; 发送层在它下面变化 。
什麽? <Content> 为你做
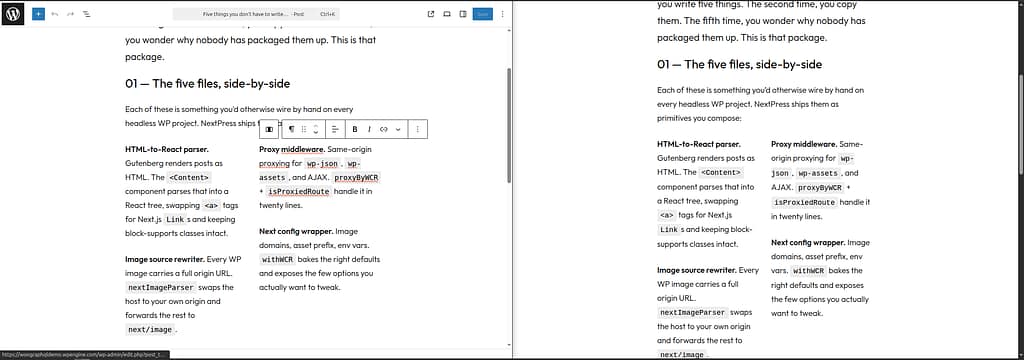
邮政正文是一串WordPress块 HTML. 贴入一个 dangerouslySetInnerHTML 但在这个过程中你会失去三件事 <Content> 处理它们:
- 将 HTML 解析为反应树。 每个
<p>, (中文(简体) ).<figure>, (中文(简体) ).<blockquote>是一个真正的反应节点,你可以用解析器来覆盖它。nextImageParser互换<img>页:1next/image上游零标记变化。 - 让每个街区的CSS进入响应中. Block-supports inline rules,主题.json调色符符,插件注入的活页-它们与页面接通,因此水合后没有布局变化.
- 保留
<script type="application/json">blobs 完好无损。 这就是互动块(motion engine,手风琴,有取景符的任何东西)如何在不单独API回转的情况下,手向客户端-侧码表示.
下一个动作
同样的六个文件在几个明显的方向上延伸. 分类和标记是另一个WPGraphQL where 参数 fetchPosts. 在同一查询中评论和标注。 搜索点击 search 辩论和您运送 /search?q=... 20分钟后出发
全源打开 GitHub 图像。在 /docs/下册如果你想要建筑设计 为何要保留WordPress 并添加Next.js作为传送层 那块东西就要来了
Leave a Reply