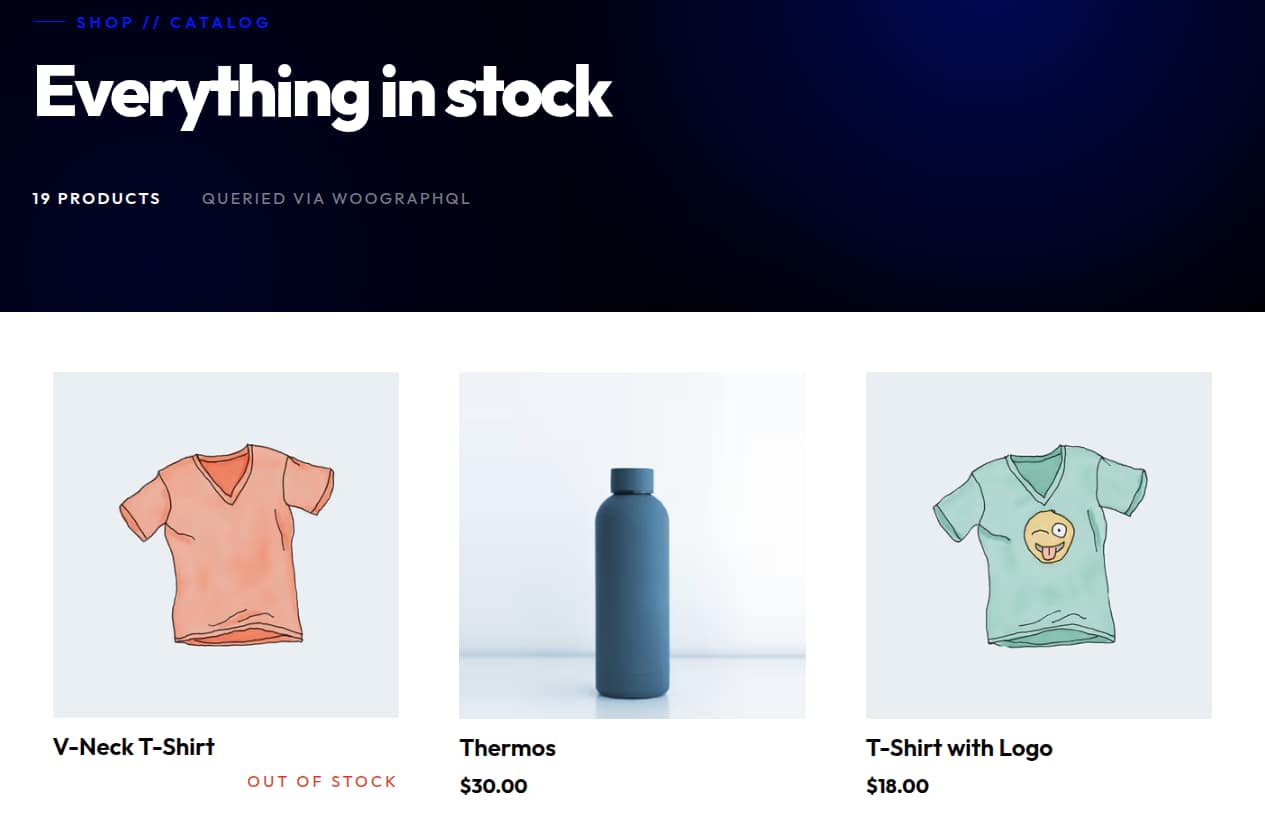
你让博客工作。 现在加入商店。 这条路从哪里接来 无头博客教程 离开。 两个新的 WordPress 插件,一个路由组拆分,所以WP-ressed的页面得到自己的根版式,一个单页头—— Cart-Token 连接您的 Next. 正在为您博客服务的同样应用程序现在正在提供商店前端,
伴行还原: github.com/AxisTaylor/ nextpress-woographql-快速启动。这是 nextpress-quickstart 从博客的教程中找到上面应用的所有内容 —— 复制它, 运行 npm install && npm run dev,你有整个流 逆 woographqldemo.wpengine.com。 。 。 。
这是给谁的?
您拥有一个已有的 Next.js app —— 您的, 或者您在博客教程之后创建的 。 你想要商业: 产品、推车、退货、付款、库存、税收、航运等等。 你对写最后六件事不感兴趣。 WooCommerce运营~500万个活店面,扩展市场是任何开源商业平台中最大的. 你为博客构建的无头WordPress设置也是无头的WooCommerce设置——同后端,同代理,再两个插件和布局重构.
关于认证的说明:没有
这个教程走过一个 仅限客人 库头。 没有登录页面,没有账户仪表板,没有JWT刷新回路. 这个 Cart-Token WooCommerce hands back本身就是会话标识符——一位客人可以浏览,添加到推车中,检查出站,并且只用他们的计费电子邮件和他们确认的订单密钥查看他们的订单. 这涵盖了大部分商店前期的幸福之路。 如果你真的想要验证的客户账户,请监听 wp-graphql-无头日志 或者说 wp-graphql-jwt-校正 与Cart-Token相接,
博客教程的变化
- 两个新的WP插件: 吴商和 WooCommerce 的 WP GraphQL 标签。 。 。 。
- 路由组分裂. 删除
app/layout.tsx。将应用中的路径移动到app/(main)/他们自己的根布局。 将 WP 任务路线( 列车、 退站、 博客) 移动到app/(wordpress-pages)/带有单独的根布局<WPHead />内部<head>。WC 检查出块发出的导入映射和脚本模块只有在导入映射标记保存在文档中时才会正确解析<head>,如果有外根布局,则嵌入式布局不能放在那里<html>。 。 。 。 - 中间软件连接会话. 读取
sessionToken每一个代理WP REST / AJAX 请求的饼干,作为附件附上Cart-Token头曰. 抓取任何旋转Cart-Token并坚持它回到饼干里 所以下一个请求 停留在同一个WC会话。 - 服务器端的 GraphQL 向前获取相同的标题 。 两者
fetchPageByUri和fetchAssetsByUri必须包括Cart-Token跳过它fetchAssetsByUri单个最尖锐的Gotcha——WC检查出区块服务器对接空推车并烤出一个"Cannot create order from empty cart"错误进入wcSettings.checkoutData,则页面永久被卡住。 - 被打磨的产品页 带有可变产品变异选择器(按属性匹配)
name没有label——地方属性有微妙之处。 - 通过服务器动作查询客人订单 。
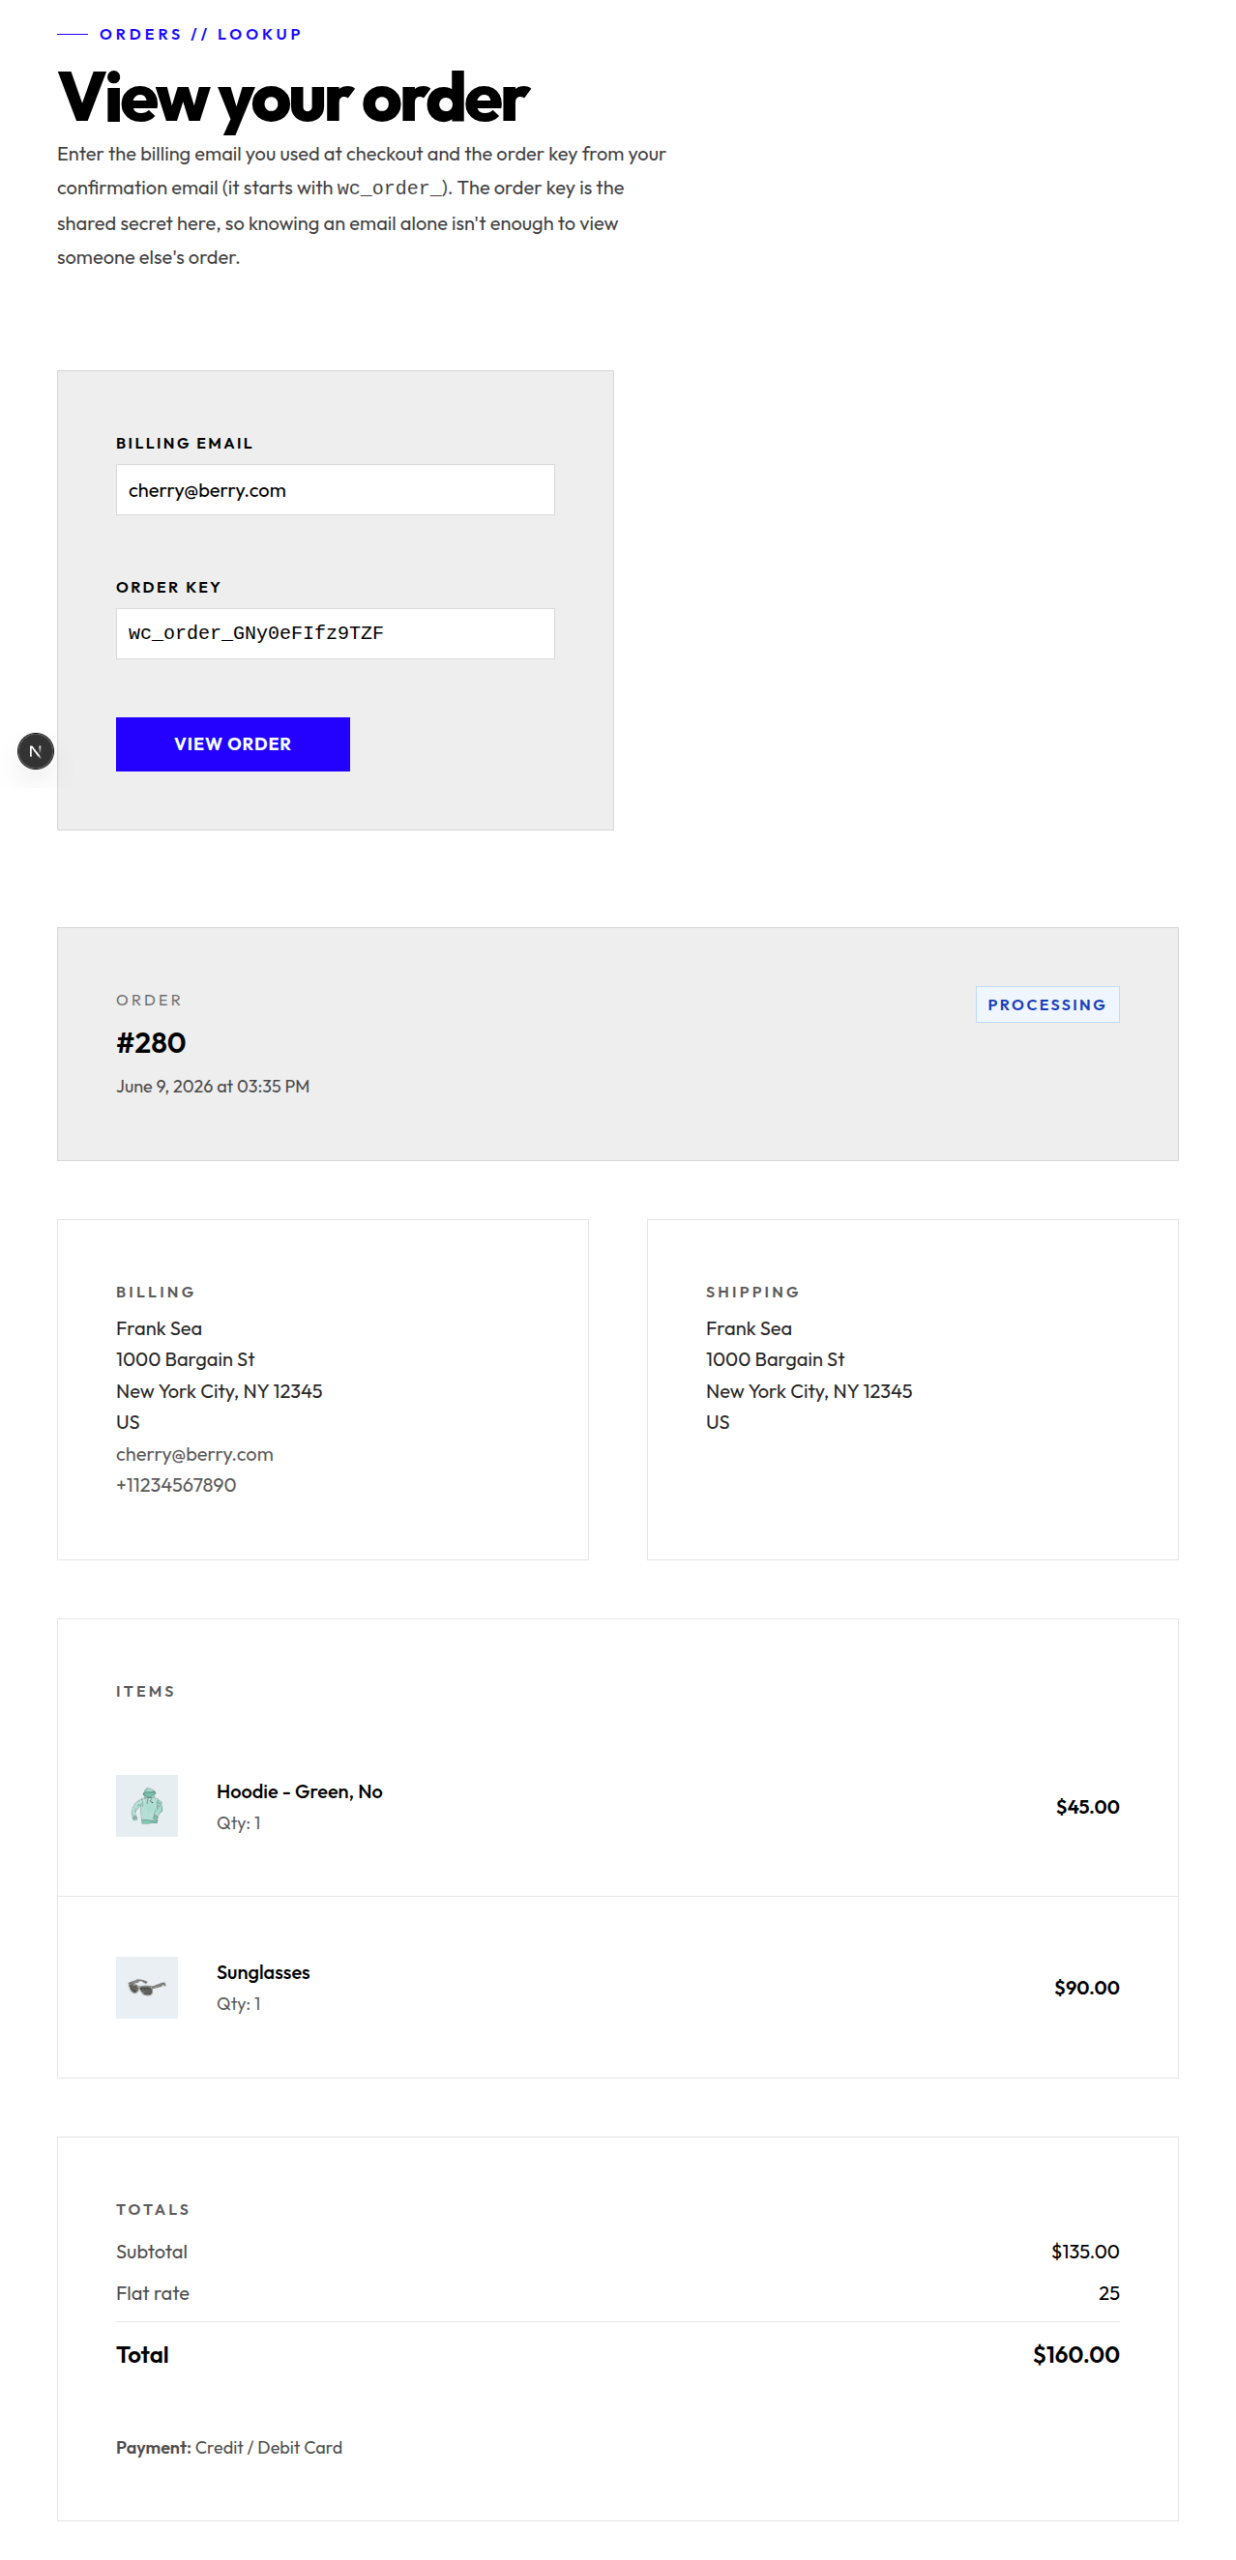
/view-order使用计费电子邮件+订单键并制作订单。 服务器动作将电子邮件绑定到当前Cart-Token届会通过updateCustomer,然后用顺序键缩小命令连接。 没有应用程序密码,没有商店管理账户。 - 自动收到时间
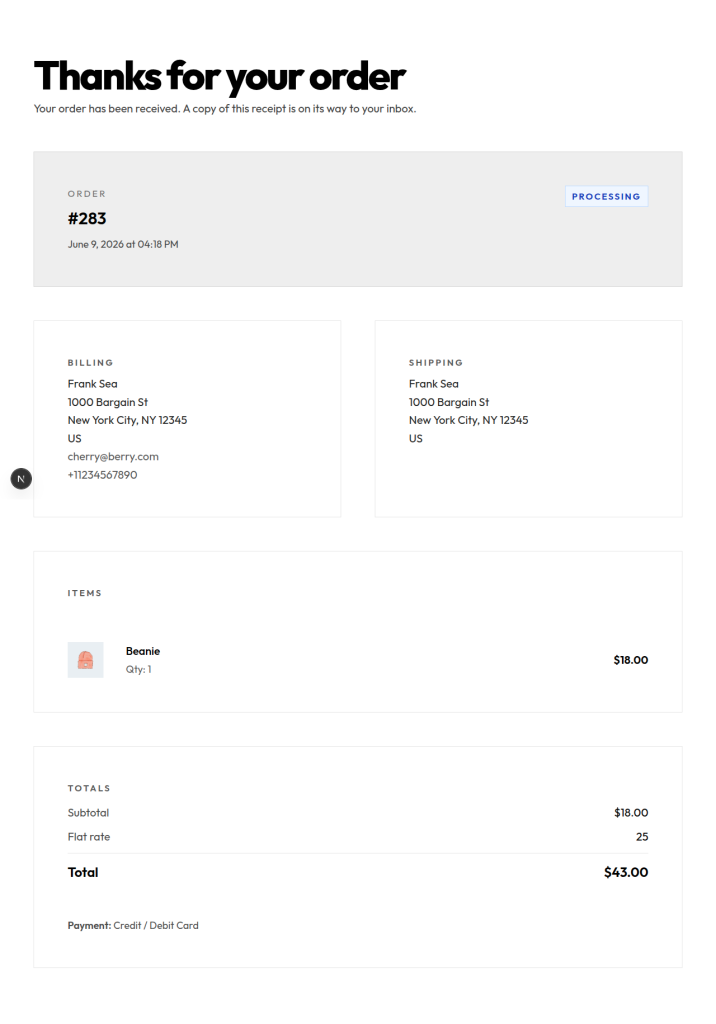
/checkout/order-received/[id]。 。 。 。 一个客户端组件将 WC 检查块的计费邮件捕获成饼干 。 收件页读取 cookie + the?key=在 URL 上,通过相同的服务器动作查看顺序——没有要填写的表单。 - 产品审查 连接到一个微小的
/api/product/review呼唤 WooGraphQL 的路由writeReview与 Cart-Token 转发的变异。
第1步——安装两个WP插件
- 伍商 ——来自插件目录. 运行设置向导, 在 Streape Test 中投放支付, 添加几个演示产品, 所以有问题可查。 确认
/cart和/checkout使用块模板( 自 Woo 8.3 起的默认) , 而不是遗留的短码 —— 这就是 NextPress 将代理的 。 - WooCommerce 的 WP GraphQL 标签 – 将产品、推车、客户和订单类型添加到
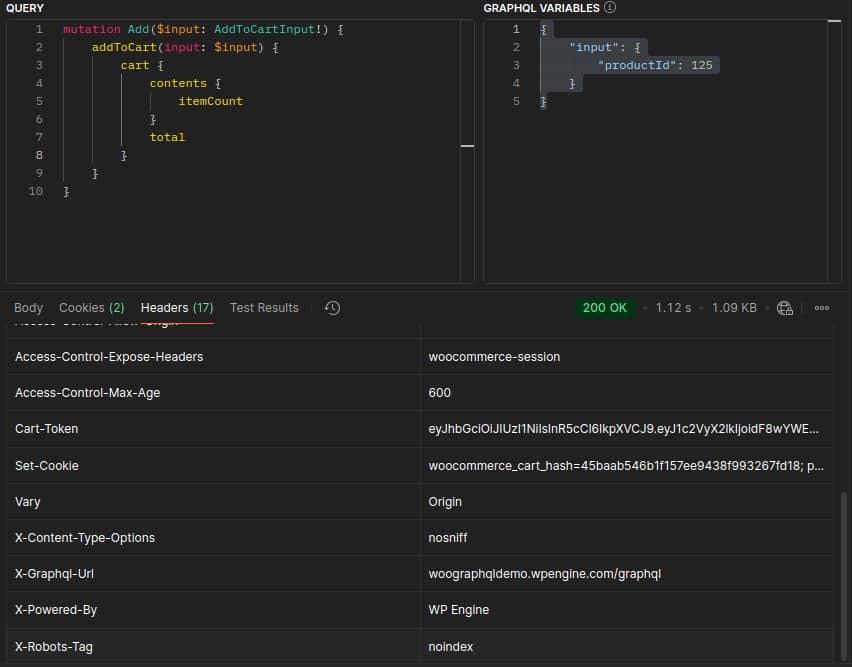
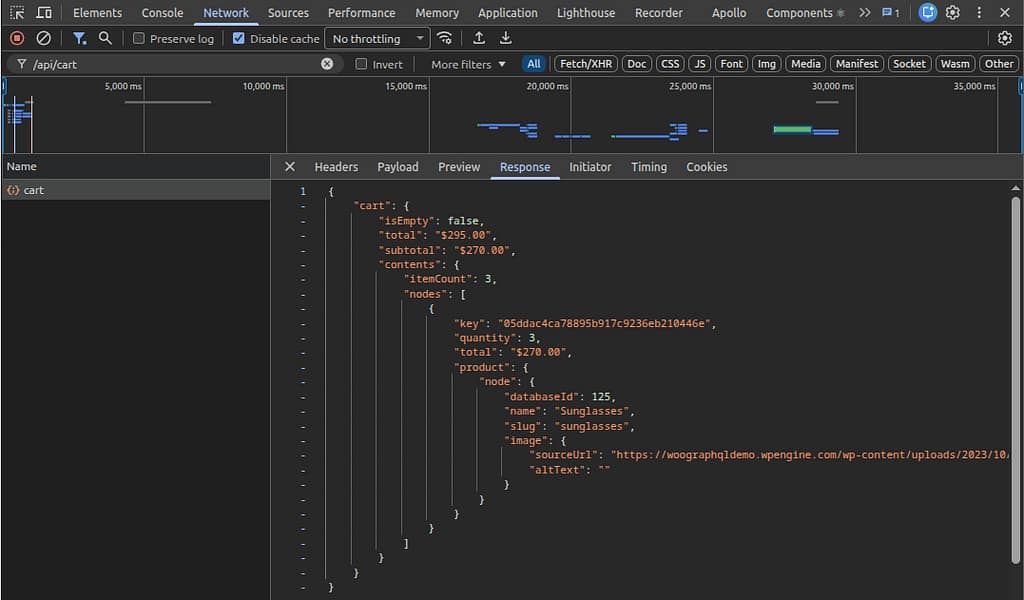
/graphql在 Postman(或显示响应头的 HTTP 客户端—— GraphiQL 隐藏它们)中通过发射addToCart相对于真实的变异productId没有Cart-Token在请求。 WP 创建新的来宾会话并返回 JWT 在Cart-Token响应头。
mutation BootGuestSession {
  addToCart(input: { productId: 13, quantity: 1 }) {
    cart {
      contents { itemCount }
      total
    }
  }
}
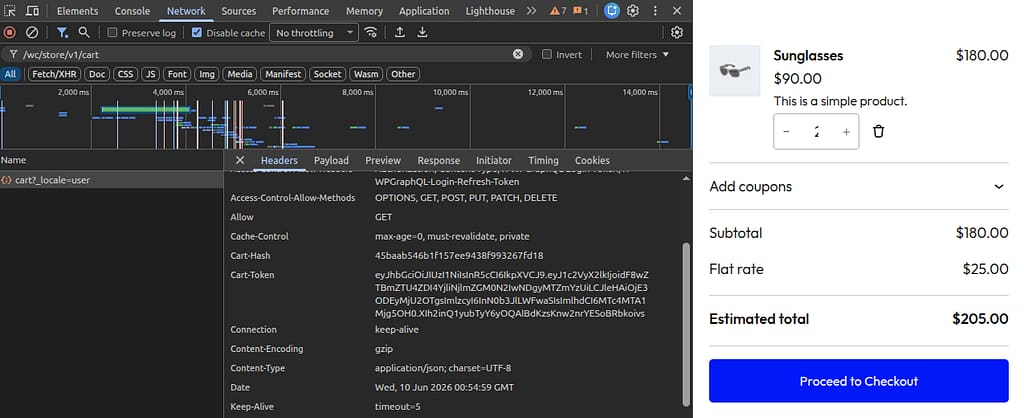
这个 Cart-Token 仅装车和会话的船头 变异 —— 说 addToCart, (中文(简体) ). updateItemQuantity, (中文(简体) ). removeItemsFromCart, (中文(简体) ). applyCoupon还有朋友 对 /graphql GraphiQL也不会显示响应头, 一旦中间软件看到一个近端响应上的头,它就会将新值坚持到 sessionToken cookie, 以及之后的每一个请求 — REST 从取出块拨打, 在您的 Next.js app 中服务器侧 GraphQL 查询 — 都会骑在它上 。
步骤2——路由组拆分
这是最大的一次结构变化。 删除 app/layout.tsx。将每条路由移动到两个顶级路由组的下面,每个路由组都有自己的根版式:
src/app/
├── api/
│   ├── cart/route.ts             ← cart mutations (server-only)
│   └── product/review/route.ts   ← review submission (server-only)
├── globals.css
├── (main)/                       ← in-app routes
│   ├── layout.tsx                ← <html>/<body> for the catalog + lookup surface
│   ├── page.tsx                  ← /
│   ├── products/
│   │   ├── page.tsx              ← /products
│   │   └── [slug]/page.tsx       ← /products/[slug] (Simple + Variable)
│   └── view-order/page.tsx       ← /view-order (guest order lookup)
└── (wordpress-pages)/            ← WP-rendered routes
    ├── layout.tsx                ← <html><head><WPHead /></head><body>
    ├── cart/page.tsx             ← /cart
    ├── checkout/
    │   ├── page.tsx              ← /checkout (+ CheckoutEmailCapture)
    │   └── order-received/[id]/page.tsx  ← auto-receipt
    └── blog/
        ├── page.tsx
        └── [slug]/page.tsx
为什么? 下一个.js只允许 <html> 和 <body> 在根布局中。 没有 app/layout.tsx,每个顶级路由组成为自己的根. 这个 (wordpress-pages) 根可以设置 <WPHead /> 直接进去 <head> – 就是这里 <script type="importmap"> 为 WC 模块格式脚本所发射 已经 活下来 在单个根下尝试一个嵌入式布局,导入图最终会进入 <body>; 然后模块脚本无法解析 @wordpress/plugins 整棵被推倒的树 都倒入其中了
import { headers } from 'next/headers';
import { WPHead, WPFooter } from '@axistaylor/nextpress';
import { fetchAssetsByUri, fetchGlobalStyles } from '@/lib/wp';

export const dynamic = 'force-dynamic';

const CRITICAL_STYLESHEETS = [
  'wp-block-library', 'wp-block-library-theme', 'global-styles',
  'classic-theme-styles', 'wc-blocks-style', 'wc-blocks-vendors-style',
];

export default async function WordPressLayout({ children }) {
  const uri = (await headers()).get('x-uri') || '/';
  const [{ scripts, stylesheets, importMap }, globalStyles] = await Promise.all([
    fetchAssetsByUri(uri),
    fetchGlobalStyles(),
  ]);

  return (
    <html lang="en">
      <head>
        <WPHead
          scripts={scripts}
          stylesheets={stylesheets}
          globalStyles={globalStyles}
          importMap={importMap}
          pathname={uri}
          criticalHandles={CRITICAL_STYLESHEETS}
        />
      </head>
      <body>
        <main>{children}</main>
        <WPFooter scripts={scripts} pathname={uri} />
      </body>
    </html>
  );
}
步骤 3 — Cart- Token 中件桥
更新 src/proxy.ts 将车牌附加到每个代理的 WP REST/ AJAX 请求中,然后捕捉任何旋转的 WP 写回回复的 。 当手推车挡前端获取时 /wc/store/v1/cart 从浏览器中,它会通过您的 NextPress 代理服务器, 而代理服务器需要翻译您的 。 sessionToken 饼干进入 Cart-Token 标题 WooCommerce 期望。 WooCommerce偶尔会旋转指使符(在被推车突变后,一个通让符适用等);响应头是它如何指示新值.
import { NextResponse, NextRequest } from 'next/server';
import {
  proxyByWCR, isProxiedRoute,
  isWCAjaxRequest, isWPAjaxRequest, isWPRestRequest,
} from '@axistaylor/nextpress/proxyByWCR';

export const proxy = async (request: NextRequest) => {
  const pathname = request.nextUrl.pathname;

  // 1. 向每个代理的REST/AJAX发送墨盒
  //  浏览器侧式WC屏蔽了嘉宾实际行车会话中登陆.
  if (
    isProxiedRoute(pathname) &&
    (isWPAjaxRequest(pathname) || isWCAjaxRequest(pathname) || isWPRestRequest(pathname))
  ) {
    const sessionToken = request.cookies.get('sessionToken')?.value;
    if (sessionToken) request.headers.set('Cart-Token', sessionToken);
  }

  // 2. 代理请求,然后捕获任何旋转的 Cart-Token WP 写入
  //  并坚持作为会话Token cookie。
  if (isProxiedRoute(pathname)) {
    const response = await proxyByWCR(request);
    const rotated = response.headers.get('Cart-Token');
    if (rotated) {
      const next = new NextResponse(response.body, {
        status: response.status,
        statusText: response.statusText,
        headers: response.headers,
      });
      next.cookies.set({
        name: 'sessionToken',
        value: rotated,
        path: '/',
        maxAge: 30 * 24 * 60 * 60,
        secure: process.env.NODE_ENV === 'production',
        httpOnly: true,
        sameSite: 'lax',
      });
      return next;
    }
    return response;
  }

  const headers = new Headers(request.headers);
  headers.set('x-uri', pathname);
  return NextResponse.next({ request: { headers } });
};

export const config = {
  matcher: [
    '/atx/:instance/proxiee',
    '/atx/:instance/wp',
    '/atx/:instance/wc',
    '/atx/:instance/wp-internal-assets/:path*',
    '/atx/:instance/wp-assets/:path*',
    '/atx/:instance/wp-json/:path*',
    '/((?!_next|api|favicon.ico|sw.js|.*\\.).*)',
  ],
};
步骤 4 – 前进符号的图形QL 助手
两个帮手 src/lib/wp.ts 和WPGraphQL说话: gqlWithSession 用于需要拖动会话的询问,以及 fetchAssetsByUri 编号 : fetchPageByUri 两者都使用它。 这两把MUST都往前走 – 第二个是Gotcha。
import 'server-only';
import { cookies } from 'next/headers';

const endpoint = process.env.GRAPHQL_ENDPOINT as string;

interface FetchOptions { sessionToken?: string | null }

export async function gqlWithSession<T>(
  query: string,
  variables: Record<string, unknown> | undefined,
  options: FetchOptions = {},
) {
  const headers: Record<string, string> = { 'Content-Type': 'application/json' };
  if (options.sessionToken) headers['Cart-Token'] = `${options.sessionToken}`;

  const res = await fetch(endpoint, {
    method: 'POST',
    headers,
    body: JSON.stringify({ query, variables }),
    cache: 'no-store',
  });
  const json = await res.json();
  return { data: json.data ?? null, errors: json.errors };
}

// 关键:前面还有Cart -Token 资产 ByUri 解析器
// 触发运行 WC 的WP 侧脚本等序
// 水合金 数据  from api 请求退出块 。 没有
// 标题, wc( ) - > cart 为该请求空出, 水合物生成
// "不能从空推车创建订单", 而错误的船在
// wcSettings.checkoutData – 退出区块的退出错误
// 门永远起火。
export async function fetchAssetsByUri(uri: string) {
  const c = await cookies();
  const sessionToken = c.get('sessionToken')?.value ?? null;

  const { data } = await gqlWithSession<{ assetsByUri: any }>(
    `query ($uri: String!) {
       assetsByUri(uri: $uri) {
         importMap(scheme: RELATIVE) { name path }
         enqueuedStylesheets(first: 500) {
           nodes { handle src version before after }
         }
         enqueuedScripts(first: 500) {
           nodes { handle src strategy version group location type before after
                   dependencies { handle } }
         }
       }
     }`,
    { uri },
    { sessionToken },
  );
  const a = data?.assetsByUri;
  return a
    ? { scripts: a.enqueuedScripts.nodes, stylesheets: a.enqueuedStylesheets.nodes, importMap: a.importMap ?? [] }
    : { scripts: [], stylesheets: [], importMap: [] };
}

export async function fetchPageByUri(uri: string) {
  const c = await cookies();
  const sessionToken = c.get('sessionToken')?.value ?? null;

  const { data } = await gqlWithSession<{ page: any }>(
    `query ($uri: ID!) {
       page(id: $uri, idType: URI) { id title content contentCssClasses }
     }`,
    { uri },
    { sessionToken },
  );
  return data?.page ?? null;
}
评论 fetchAssetsByUri 并非装饰, /checkout 如果你忘记了,就沉默地失败了。 WPGraphQL很好,浏览器的 REST 调用工作, 车 REST 返回正确的项目—— 页面仍然使空卡错误, 因为 WC 块的服务器侧预装数据是相对于空卡片段生成的 。 正在转发签名符 两者 服务器端 GraphQL 获取关闭缺口。
步骤5——作为 API 路线的 Cart
相加-相加-相加-相加-相加-相加-相加-相加-相加-相加-相加-相加-相加-相加-相加-相加-相加-相加-相加-相加-相加-相加-相加-相加-相加-相加-相加-相加-相加-相加-相加-相加-相加-相加-相加-相加-相加-相加-相加-相加-相加-相加-相加-相加-相加-相加-相加-相加-相加-相加-相加-相加-相加 /api/cart 处理者。 路线读取 sessionToken 从 cookie 中运行 WPGraphQL 变异 Cart-Token ,并返回更新的推车。 第3步的中间器件负责在出道时持续任何旋转符.
import { NextRequest, NextResponse } from 'next/server';
import { cookies } from 'next/headers';
import { gqlWithSession } from '@/lib/wp';

const COOKIE_OPTS = { httpOnly: true, secure: true, sameSite: 'lax' as const, path: '/' };

async function readSession() {
  return { sessionToken: (await cookies()).get('sessionToken')?.value ?? null };
}

interface CartActionPayload {
  action: 'add' | 'update' | 'remove' | 'clear' | 'applyCoupon' | 'removeCoupon';
  productId?: number;
  variationId?: number;
  variation?: { attributeName: string; attributeValue: string }[];
  quantity?: number;
  key?: string;
  code?: string;
}

export async function POST(req: NextRequest) {
  const payload = (await req.json()) as CartActionPayload;
  const auth = await readSession();

  if (payload.action === 'add') {
    const result = await gqlWithSession<{ addToCart: { cart: unknown } }>(
      `mutation Add($input: AddToCartInput!) {
         addToCart(input: $input) { cart { contents { itemCount } total } }
       }`,
      { input: {
        productId: payload.productId,
        variationId: payload.variationId,
        variation: payload.variation,  // local-attribute variations need this
        quantity: payload.quantity ?? 1,
      } },
      auth,
    );
    if (result.errors?.length) {
      return NextResponse.json({ error: result.errors[0].message }, { status: 400 });
    }
    return NextResponse.json({ cart: result.data?.addToCart?.cart ?? null });
  }

  // ... 更新 / 删除 / 应用 Coupon / 清晰遵循相同的模式
}
请注意 variation 输入的数组。 可变产品加载到载体需要它来进行混合全球和地方属性的变异——见步骤7.
步骤6——被打磨出的产品页
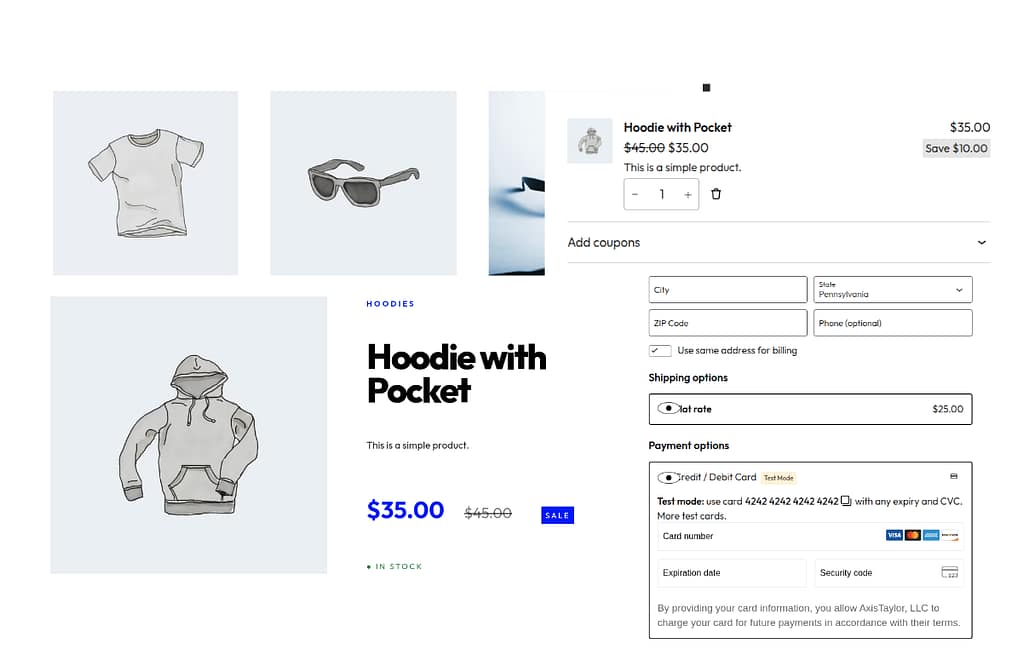
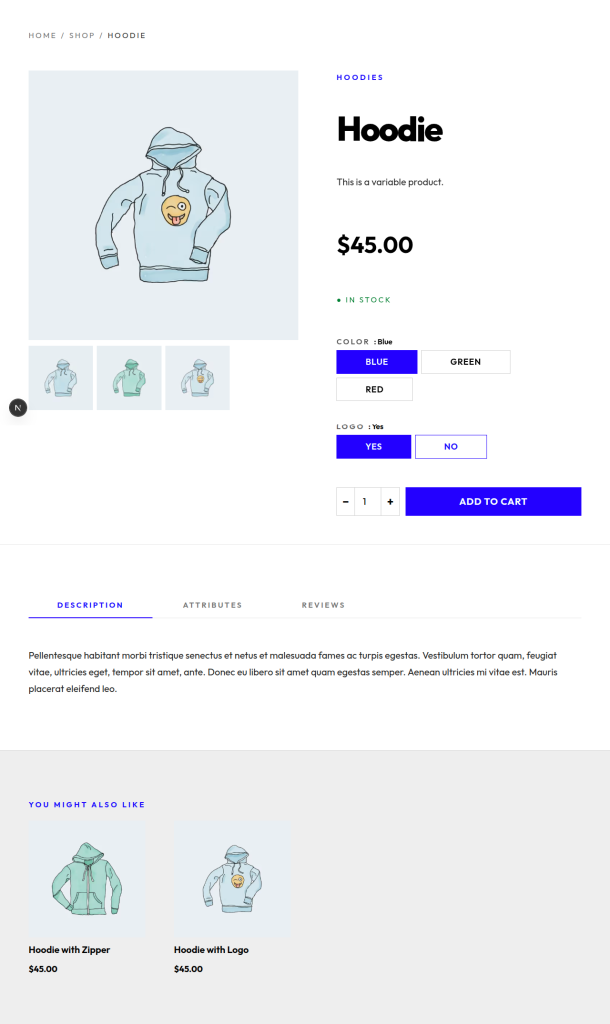
产品页将浏览器转换成买家,所以这就是你花在实际设计时间的地方. 服务器组件, ISR 标记, 整个视图的单个 GraphQL 查询: 标题、 英雄图像、 画廊( 显示每个图像的自然外观比 ) mediaDetails),价格+销售徽章,股票徽章,短相+长相描述,相關出品相關相關相關相關相關相關相關相關相關相關相關相關相關相關相關相關相關相關相關相關相關相關相關相關相關相關相關相關相關相關相關相關相關相關相關相關相關相關相關相關相關相關相關相關相關相關相關相關相關相關相關相關相關相關相關相關相關相關相關相關相關相關相關相關相關相關相關相關相關相關相關相關相關相關相關相關相關相關相關相關相關相關相關相關相關相關相關相關相關相關相關相關相關相關相相關相關相關相關相關相相關相相關相關相關相相關相關相關相相關相關相相關相相相相相相相相 页面发送日期 __typename 给两个英雄组件中的一个 两者都使移动-第一——大多数商店前端流量都是移动的,下面的截图是小取景口视图来证明.
import { notFound } from 'next/navigation';
import { fetchProductBySlug, fetchProductSlugs } from '@/lib/wp';
import { SimpleProductHero } from '@/components/SimpleProductHero';
import { VariableProductHero } from '@/components/VariableProductHero';
import { ProductTabs } from '@/components/ProductTabs';

export const revalidate = 300;

export async function generateStaticParams() {
  return (await fetchProductSlugs()).map((slug) => ({ slug }));
}

export default async function ProductPage({ params }) {
  const { slug } = await params;
  const product = await fetchProductBySlug(slug);
  if (!product) notFound();

  return (
    <>
      <article className="grid lg:grid-cols-[1.1fr_1fr] gap-12 max-w-wide mx-auto px-x-small py-medium">
        {product.__typename === 'VariableProduct'
          ? <VariableProductHero product={product} />
          : <SimpleProductHero product={product} />}
      </article>
      <ProductTabs product={product} />
    </>
  );
}
步骤7——可变产品的变化
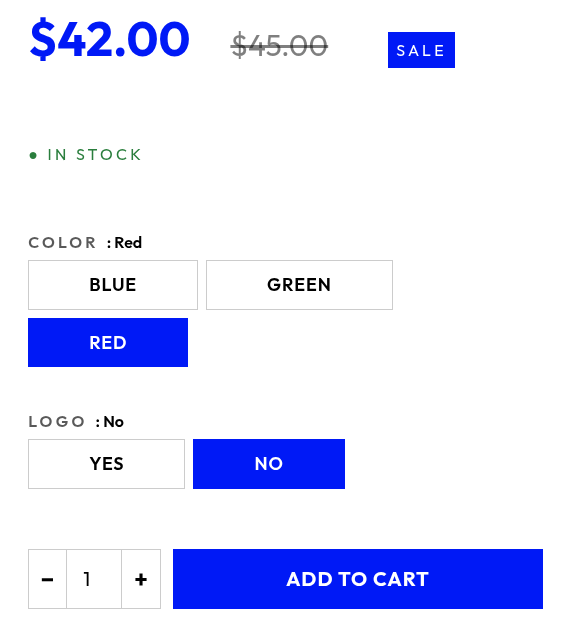
VariableProductHero 是拥有属性选择状态的客户端组件,并将价格、图像和股票徽章提升到匹配的变量。 两个小但有载荷的细节:
- 匹配者为
name没有label。 。 。 。 对于全局属性( 分类后置 :pa_color, (中文(简体) ).pa_size),两者name和label说到做到ProductAttribute和VariationAttribute对于本地属性(产品上的自由形式,无分类),ProductAttribute.label是人类的形态(“Logo”),但是VariationAttribute.label实值sanitize_title()”’d (“logo”). 两者label字段不具有可比性。name穿过sanitize_title()双方,所以它总是同意…name。 。 。 。 - 发送一个
variation添加到卡片上的数组。 当客户的选择符合真实variationId,发送两者——它让WooGraphQL将推车项目标注在这个变量上,无论属性是全球的还是局部的.
// 变形属性. label 为 LOCAL 属性的 sanitize  title () d
// (如"Logo"-"logo")但产品属性. 标签是人类的形式
// ("罗高". 二者都暴露出“ 名字” , 名称是 sanitize  title ()'d on both
// 各方——用`姓名 ' 来对应,从不用`标签 ' 来对应。
export interface VariationAttrSel { name: string; value: string }

export function variationMatches(
  variationAttrs: { name: string; value: string }[],
  selection: VariationAttrSel[],
): boolean {
  if (variationAttrs.length === 0) return false;
  return variationAttrs.every((va) => {
    if (va.value === null) return true; // "any" — accepts everything
    const sel = selection.find((s) => s.name === va.name);
    return sel?.value === va.value;
  });
}

export function findMatchingVariation<V extends {
  attributes: { nodes: { name: string; value: string }[] };
}>(
  variations: V[],
  selection: VariationAttrSel[],
): V | undefined {
  return variations.find((v) =>
    variationMatches(v.attributes.nodes, selection));
}'use client';
import { useState } from 'react';
import { findMatchingVariation } from '@/lib/variation-helpers';
import { AddToCartButton } from './AddToCartButton';
export function VariableProductHero({ product }) {
const [selection, setSelection] = useState({});
const current = findMatchingVariation(product.variations.nodes,
Object.entries(selection).map(([name, value]) => ({ name, value })));
const price = current?.price ?? product.price;
const image = current?.image ?? product.image;
const inStock = (current?.stockStatus ?? product.stockStatus) !== 'OUT_OF_STOCK';
const variationPayload = Object.entries(selection)
.map(([attributeName, attributeValue]) => ({ attributeName, attributeValue }));
return (
<>
<ProductGallery image={image} gallery={product.galleryImages.nodes} />
<ProductInfo price={price} inStock={inStock}>
{product.attributes.nodes.map((attr) => (
<AttributePicker
key={attr.name}
attribute={attr}
value={selection[attr.name]}
onChange={(v) => setSelection((s) => ({ ...s, [attr.name]: v }))}
/>
))}
<AddToCartButton
productId={product.databaseId}
variationId={current?.databaseId}
variation={variationPayload}
inStock={inStock && !!current}
/>
</ProductInfo>
</>
);
}
第8步——通过下一张新闻代理服务器的Cart和取出
两条路线,每条12行. 他们住在下面 (wordpress-pages) 因此,他们从第2步中取出WP-后退布局.
import { notFound } from 'next/navigation';
import { Content, nextImageParser } from '@axistaylor/nextpress';
import { fetchPageByUri } from '@/lib/wp';

export default async function CartPage() {
  const page = await fetchPageByUri('/cart');
  if (!page) notFound();
  return (
    <article>
      <Content
        content={page.content}
        contentCssClasses={page.contentCssClasses}
        parsers={[nextImageParser()]}
      />
    </article>
  );
}
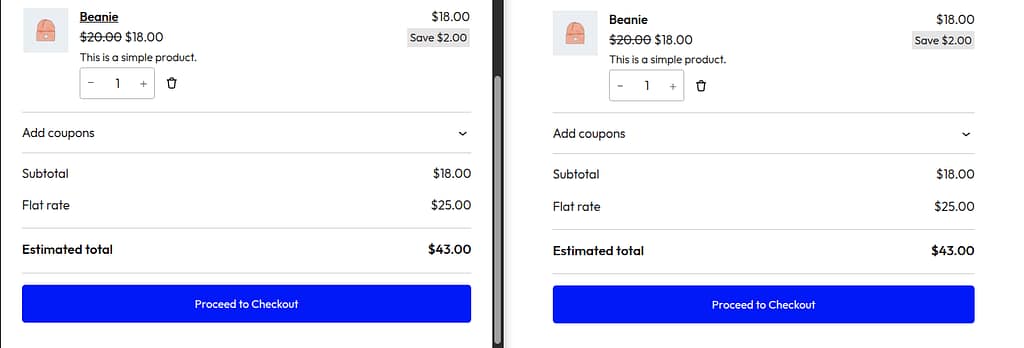
这个 (wordpress-pages) 布局获取资产图(与 Cart-Token),页面让WC车块标记,而车块前端脚本接管了水合——使用相同的. Cart-Token 中间的软件桥通了 相同的形状 /checkout/page.tsx; 博客路径的形状相同.
步骤9——通过服务器动作查询客人订单
一旦订单存在,客户需要一种方法来查看. 标准WooCommerce流程将收据放在 /checkout/order-received/[id],但它还需要一个手动搜索页面,用于重复访问,丢失的确认标签,以及电子邮件后续链接. /view-order 是该页面——带有窗体的服务器组件,发布到服务器动作上。
动作会做一些微妙的事情: updateCustomer 无 id 标 标 标 Cart-Token 届会。 设置 billing.email 将该会话绑入电子邮件; 客户端 orders 连接然后返回针对该地址的每个顺序,包括宾客命令,这是整个点。 动作缩小到 orderKey仅仅知道电子邮件并不足以显示别人的订单。
'use server';
import { cookies } from 'next/headers';
import { revalidatePath } from 'next/cache';
import { gqlWithSession, type Order, ORDER_FRAGMENT } from '@/lib/wp';
import { LOOKUP_COOKIE, ERROR_COOKIE } from '@/utils/constants';

const FIND_ORDER_MUTATION = /* GraphQL */ `
  ${ORDER_FRAGMENT}
  mutation BindEmailAndFindOrder($input: UpdateCustomerInput!) {
    updateCustomer(input: $input) {
      customer {
        orders(first: 100) {
          nodes { ...OrderFields }
        }
      }
    }
  }
`;

// 运行更新 Customer 不带 " id " 字, 将突变应用到
// 与当前 Cart- Token 会话相接的客户 。 设置
// 帐单. email 将会议内容绑定为电子邮件; 客户的
// 命令连接然后返回针对此命令的每个命令
// 地址——包括客人订单。 我们按命令缩小范围
// 仅仅知道一个电子邮件并不足以
// 显示别人的订单。
//
// 这只通过服务器动作引用运行, 所以 GraphQL
// 终点和客户约束语义 从来没有到达
// 客户端。 教学阅读器不需要应用程序密码——
// 会话本身的Cart-Token验证了变异.
export async function lookupOrder(
  email: string,
  orderKey: string,
): Promise<{ order?: Order; error?: string }> {
  if (!email?.trim() || !orderKey?.trim()) {
    return { error: 'Email and order key are required.' };
  }

  const sessionToken = (await cookies()).get('sessionToken')?.value ?? null;
  const result = await gqlWithSession<{
    updateCustomer: { customer: { orders: { nodes: Order[] } } | null } | null;
  }>(
    FIND_ORDER_MUTATION,
    { input: { billing: { email: email.trim() } } },
    { sessionToken },
  );

  if (result.errors?.length) return { error: result.errors[0].message };
  const orders = result.data?.updateCustomer?.customer?.orders?.nodes ?? [];
  const match = orders.find((o) => o.orderKey === orderKey.trim());
  if (!match) return { error: 'No order found for that email and order key.' };
  return { order: match };
}

export async function lookupOrderFormAction(formData: FormData): Promise<void> {
  const email = String(formData.get('email') ?? '').trim();
  const orderKey = String(formData.get('orderKey') ?? '').trim();
  const result = await lookupOrder(email, orderKey);

  const jar = await cookies();
  if (result.error || !result.order) {
    jar.set(ERROR_COOKIE, result.error ?? 'Order not found.',
      { path: '/', sameSite: 'lax', maxAge: 60 });
    jar.delete(LOOKUP_COOKIE);
  } else {
    jar.set(LOOKUP_COOKIE, JSON.stringify({ email, orderKey }), {
      httpOnly: true,
      secure: process.env.NODE_ENV === 'production',
      sameSite: 'lax', path: '/', maxAge: 60 * 60 * 24,
    });
    jar.delete(ERROR_COOKIE);
  }
  revalidatePath('/view-order');
}
这样可以避免:将商店管理应用程序密码手卷入演示. 校对:Soup .env” 这样做是不负责任的。 Cart-Token-as-shared-secret模式将一切保留在现有会话模式内.
步骤10——自动收到/核对/收到订单
WooCommerce 成功取出后重定向客户时, URL 是 /checkout/order-received/[id]?key=wc_order_…编辑 key 是顺序键。 电子邮件不在網址上, 我们把电子邮件客户端抓入饼干 然后接收页面读出饼干 + URL 密钥并运行相同 lookupOrder 来自 Step 9 的服务器动作
抓取组件听起来很直截了当(读取一些电子邮件输入,写给饼干),但WC的取出块很挑剔:它挂载了它的字段ASync,在”使用运算地址进行计费”切换时重新挂载计费字段集,以及——这个惊喜——水合字段值来自它自己的会话存储 不开火 input 或者说 change 事件A. 授权 input 单听会完全错过自动填充. 三个来源弥补了差距:
- 初始 DOM 扫描 挂载上 —— 抓取当值时已经存在的值(自动填充、浏览器自动完成)。
- 变异观察员 打开
document.body与attributeFilter: ['value']——抓取挂载后输入和会话恢复值的书写. - 捕捉阶段
input编号 :change代表团 打开document——抓活打字.
'use client';
import { useEffect } from 'react';
import { CHECKOUT_EMAIL_COOKIE } from '@/utils/constants';

// WC检查出区块同步挂起球场并重新挂起
// 当客户切换“使用货运方式”时, 计费字段设置
// 账单". 它也会从自己的会话存储中水合值
// 没有发射投入/改变活动——因此仅授权听众
// 错过自动填充的邮件 。 我们需要三个来源:
//  1. 挂载时初步DOM扫描——已显示捕获值。
//  2. 变异观察员——捕获后期投入
//  会话恢复的值写入 。
//  3. 投入/改变授权——捕获用户实时输入。
function isEmailField(el: Element | null): el is HTMLInputElement {
  if (!(el instanceof HTMLInputElement)) return false;
  if (el.type === 'email') return true;
  const probe = `${el.name} ${el.id} ${el.autocomplete}`.toLowerCase();
  return probe.includes('email');
}

function writeCookie(value: string): void {
  const trimmed = value.trim();
  if (!trimmed) return;
  const secure = location.protocol === 'https:' ? '; secure' : '';
  document.cookie = `${CHECKOUT_EMAIL_COOKIE}=${encodeURIComponent(trimmed)}; ` +
    `path=/; max-age=3600; samesite=lax${secure}`;
}

function scan(root: ParentNode): void {
  root.querySelectorAll<HTMLInputElement>(
    'input[type="email"], input[name*="email" i], input[id*="email" i], input[autocomplete*="email" i]',
  ).forEach((el) => { if (isEmailField(el) && el.value) writeCookie(el.value); });
}

export function CheckoutEmailCapture() {
  useEffect(() => {
    scan(document);

    const handler = (e: Event) => {
      if (e.target instanceof Element && isEmailField(e.target)) {
        writeCookie((e.target as HTMLInputElement).value);
      }
    };
    document.addEventListener('input', handler, true);
    document.addEventListener('change', handler, true);

    const observer = new MutationObserver((muts) => {
      for (const m of muts) {
        m.addedNodes.forEach((n) => { if (n instanceof Element) scan(n); });
        if (m.type === 'attributes' && m.target instanceof HTMLInputElement
            && isEmailField(m.target)) {
          writeCookie(m.target.value);
        }
      }
    });
    observer.observe(document.body, {
      subtree: true, childList: true,
      attributes: true, attributeFilter: ['value'],
    });

    return () => {
      document.removeEventListener('input', handler, true);
      document.removeEventListener('change', handler, true);
      observer.disconnect();
    };
  }, []);
  return null;
}
打开它 /checkout/page.tsx 旁边 <Content> 块和饼干在客户点击 Place Order 时设定。 收件页读取并制作——没有表单,没有额外点击.
import Link from 'next/link';
import { cookies } from 'next/headers';
import { OrderSummary } from '@/components/OrderSummary';
import { lookupOrder } from '@/actions/order';
import { CHECKOUT_EMAIL_COOKIE } from '@/utils/constants';

interface Props {
  params: Promise<{ id: string }>;
  searchParams: Promise<{ key?: string }>;
}

export default async function OrderReceivedPage({ params, searchParams }: Props) {
  const { id } = await params;
  const { key } = await searchParams;
  const email = (await cookies()).get(CHECKOUT_EMAIL_COOKIE)?.value ?? '';
  const fallback = key ? `/view-order?key=${encodeURIComponent(key)}` : '/view-order';

  if (!key || !email) {
    return (
      <main>
        <h1>Thanks for your order</h1>
        <p>We couldn't auto-load the receipt because your billing email isn't
          available on this device. Look up the order with the email you used at
          checkout — the order key from your confirmation email is the shared
          secret.</p>
        <Link href={fallback}>Look up the order</Link>
      </main>
    );
  }

  const { order, error } = await lookupOrder(email, key);
  if (!order) {
    return (
      <main>
        <h1>Thanks for your order</h1>
        <p className="error">{error ?? "We couldn't find that order."}</p>
        <Link href={fallback}>Look up the order</Link>
      </main>
    );
  }

  return (
    <main>
      <OrderSummary
        order={order}
        headline="Thanks for your order"
        intro="Your order has been received. A copy of this receipt is on its way to your inbox."
      />
    </main>
  );
}
倒转链接到 /view-order?key=… 有关“客户三天后在新设备上重新打开收件邮件”的事务——饼干不见了,但电子邮件中的顺序键仍然用于人工查询。
步骤11——产品审查
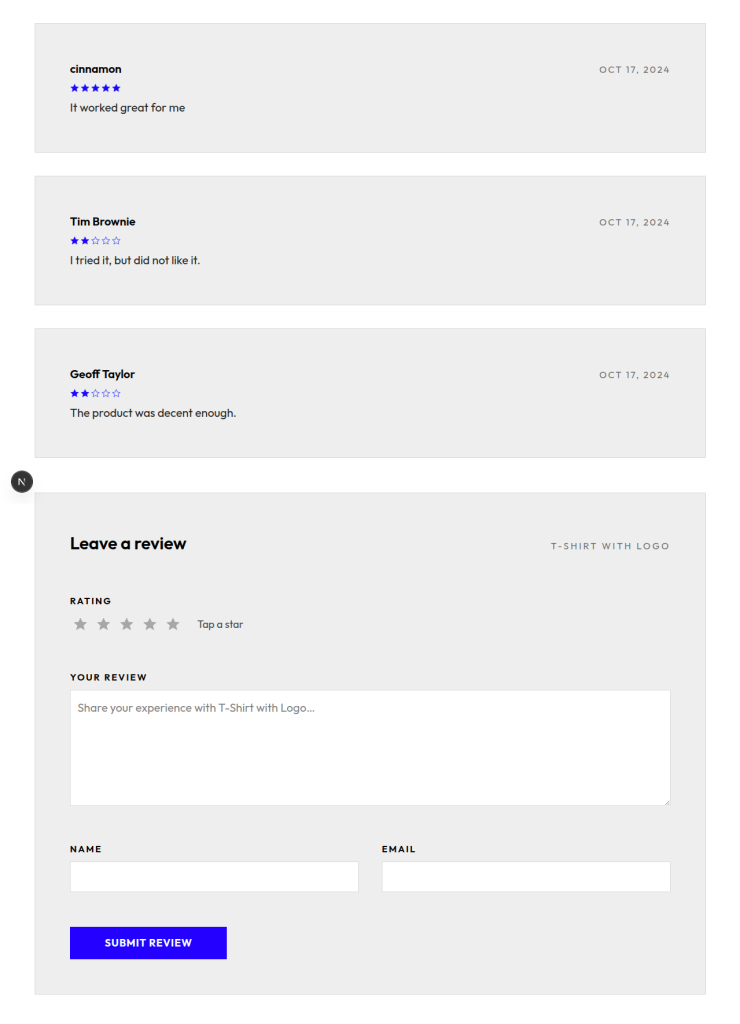
评论是一个很小的POST处理器, writeReview 变相. 客户端表格发送 productId,作者名称、电子邮件、评分和内容;路径附加 Cart-Token,运行突变,WP后端处理适度队列,垃圾邮件检查和存储.
import { NextRequest, NextResponse } from 'next/server';
import { cookies } from 'next/headers';
import { gqlWithSession } from '@/lib/wp';

export async function POST(req: NextRequest) {
  const { productId, author, email, content, rating } = await req.json();
  const sessionToken = (await cookies()).get('sessionToken')?.value ?? null;

  const result = await gqlWithSession<{ writeReview: { rating: number } }>(
    `mutation Write($input: WriteReviewInput!) {
       writeReview(input: $input) {
         rating
         review { id }
       }
     }`,
    { input: {
      commentOn: productId,
      author, authorEmail: email,
      content, rating,
    } },
    { sessionToken },
  );

  if (result.errors?.length) {
    return NextResponse.json({ error: result.errors[0].message }, { status: 400 });
  }
  return NextResponse.json({ ok: true, rating: result.data?.writeReview?.rating });
}
把它接到一个 <ReviewForm /> 内置客户端组件 <ProductTabs /> 在产品页上。 复检列表本身从同一产品查询中变为服务器侧;页码是你想要的任何内容.
烟雾测试全流
端对端:访问 /products/hoodie,选择一个颜色+标志变体,单击添加到手推车,降落在 /cart 并显示项目, 单击 继续检查, 填写 Frede 测试卡 4242 4242 4242 4242把订单,着陆 /checkout/order-received/[id]?key=… 并自动收到全部收据。 出道5分,单曲”Next.js”主机,完整WooCommerce后端管弦乐. 没有登录 没有账户 没有JWT刷新循环
如果取出页面让“不能从空推车创建命令 ” — — 那就是 fetchAssetsByUri 从第四步得到了你。 打开请求到 /graphql 运行 assetsByUri 在安全部门改革方面,并核查它携带 Cart-Token 头曰. 车挡前端将来自REST,但 离职 块预装 wcSettings.checkoutData 在资产比对时间生成服务器侧并打开整个UI。
你没有建立的东西
- 支付网关——花条、花页、广场、克拉纳等50个
- 税收引擎——WooCommerce Tax (免费), Avalara, TaxJar
- 运价 API — USPS, UPS, FedEx, DHL, 定制平率逻辑
- 订阅费——计费周期、审判、停机、按比例升级
- 库存 — — 库存水平、低库存通知、回购、每个变量跟踪
- 库邦引擎——使用限制,客户段,产品/类别限制
- 订单管理——退款,部分退款,订单笔记,客户电子邮件
- 审查温和度——垃圾邮件检查,亵渎过滤,队列UI
WooCommerce处理这一切。 你处理产品页UX和店面的铬。 接下来的Press将两者连接起来,而不让你在”看起来我想要的方式”和”工作与我买的扩展”之间做出选择.
快捷键: WooGraphQL 订阅
以上一切为开源道. 在博客辅导之外还有几百行新代码, 如果你的团队时间花在存储前UX上胜过写会话管理生命周期代码,那正是 a 伍格拉弗QL 订阅 这是为。
订阅包有三件事:
WooGraphQL Pro 插件
WordPress插件,用于扩展GraphQL计划,为您实际销售的WooCommerce产品变体提供类型、查询和变异: 订阅、复合产品、产品包和产品加载。免费的WooGraphQL计划只会暴露简单且可变的产品;当你的目录包括一个捆绑或订阅时,你就成了手卷倒置的REST。 有了Pro插件,这些产品类型就属于Schema中的一等产品,而是一个单等产品 { product(id: …) } 查询返回该产品恰好是什么形状。
创建- wonext- 应用 CLI
A级 脚手架一样工作 create-next-app,但它生成的锅炉板是一个工作下.js + WooGraphQL 商店前端. npx create-woonext-app my-shop,将其指向你的WP后端, 并且你有产品页,推车,取出, 和账户流运行在端到端之前,
@woographql/*联署材料包
- @ woographql/ ext ——一个组件生成工具包,工作方式与Shadcn/ui相同:运行一个命令,组件降落在您的Repo中,您拥有并定制了代码. 组件库覆盖整个库前表面——
CartOptions单是让Woo支持的每个产品类型(简易、可变、复合、Bundle、订阅、Add-On)的手动操作UI,其形式状态和验证已经有线。 - @ woographql/ react- hooks ——打入的钩子会崩溃你上面写的生命周期代码.
useSessionManager()替换 cookie-jugling 、 手推箱旋转 和 SSR- Time 标题转发 。useCartMutations()替换/api/cart路由加客户端胶水,其中包含乐观的更新并包含每个键错误回滚. - @ woographql/ session- utils ——这些钩子背后的下层构件:令牌加密,饼干/存储抽象,签名状态序列化. 一旦你把第二个Woo店面运出,
选择开源路径, 如果你想知道在引擎盖下发生的事情, 选择订阅, 如果您宁可将商店前端运出, 而不是成为会话管理图书馆作者 。 无论哪种方式,这个教程中的架构都是正确的架构;订阅只是给了您一个被打出,测试过的依赖性来打磨的生命周期代码版本.
当这是错误的呼叫
- 绿地项目没有商业依赖性和单一产品目录. Frede Counterout + a自定义 React storefront 船更快. 进WP+Woo是过度杀伤 直到你需要税收,航运,或多个SKU。
- 手取价取出B2B引出. “要求报价、获得定价、转换成订单”的推车构建工作流程,
- 多供应商市场。 Woo拥有多版本的扩展功能,
其余部分——大多数需要通商的应用软件,尤其是已经服务WordPress内容的应用软件——将Woo作为通商后端,将NextPress作为通商桥,使得您可以在一个下午”在同一Next.js主机上销售产品”. 订阅、自定义支付网关、多货币、废弃卡片回收、B2B定价等级等,
Leave a Reply